It’s been a while since I shared code of things I’m working on here. Since one of the projects is not yet announced (a secret!), but the code for it is useful, I thought it’s about time that I do one of these again…
My last little code project was to FINALLY make a vanilla-javascript based image gallery (just plain javascript, no jquery or anything). I’ve been putting this off for years, and the last one I had was just a hacked together thing.
I got around to making one that’s extremely simple, no massive features, and easy to customize!
The resulting gallery is really cool, and I finally have a home for all my animated gif art from my games. I’ll be regularly updating it with art. Check it out here!
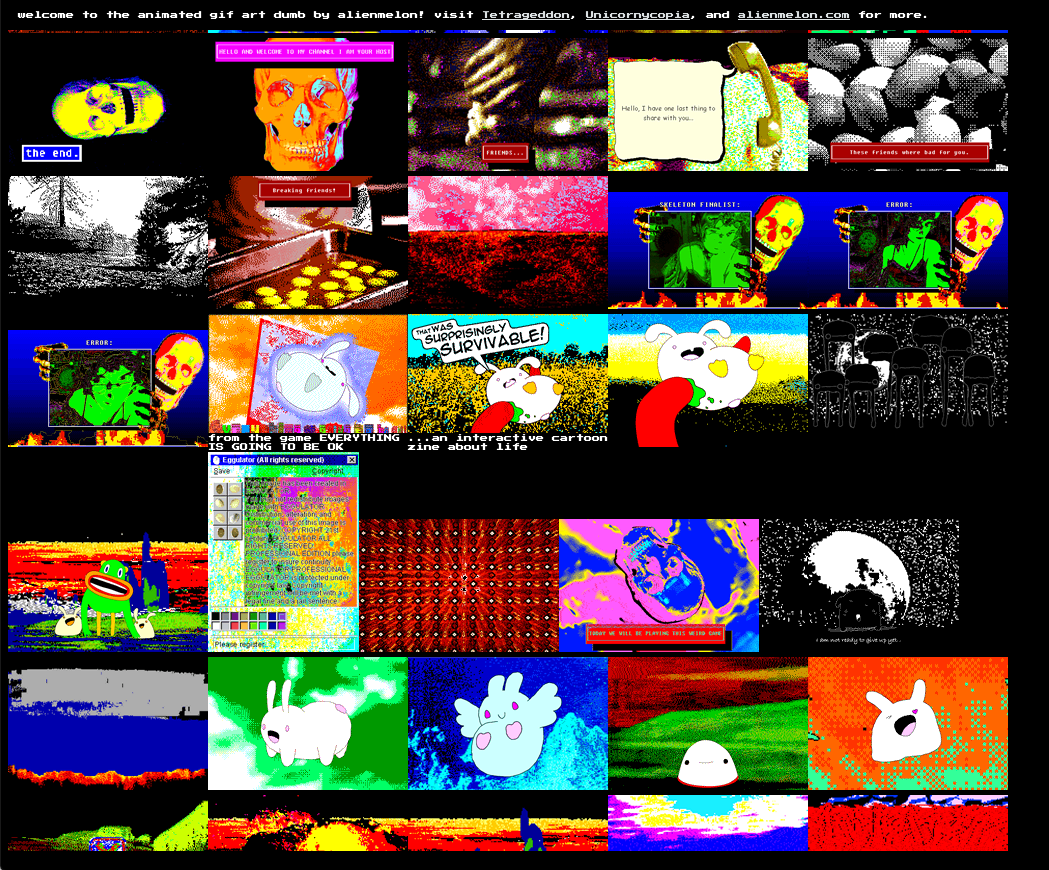
This image gallery lists a bunch of thumbnails. If you click on a thumbnail there’s a small CSS fade transition, and the larger image shows.
It works on mobile and all the browsers (including IE).
Visitors can even save or share images posted there. If you look at the code there’s an option for making sharing and saving images harder (by setting backgroundImage to the fullscreen image, instead of it being in it’s own image element)…
There’s also space for your own header or footer (optional).
There’s also optional image and thumbnail captions…
I mean, that’s it! Super simple.
* Download it on github here.
* Read the documentation for how to customize it here.
* Live demo of it here.
You are absolutely free to use any and all code from it!
…So that’s one thing.
The other project I’ve been working on is a desktop Electron App. It does a bunch of fun things. It’s a bit of a web-app too… I’m really proud of it and can’t wait to actually show the finished thing.
In the meantime here’s some code that I decided to share because I feel like these are oddly specific things where it would be great if people google for it and find an easy copy-paste solution for themselves, without having to extend too much effort in making their own.
— — — — — — —
Javascript and PHP countdown timer (by server time)
The first one is a countdown timer that counts down based on server time. It pings the server every 5 minutes (or you can set that to less if you want), to update the countdown.
The countdown clock also rounds down the numbers by days (if there are more), then if you get closer to the end date it rounds by hours, and then minutes…
The thing about countdown timers is that you (sometimes) don’t really want to use whatever javascript solution, and (in this case) PHP was the easiest solution, because people can set their system clock forward or backward and that kinda is cheating… In cases where you want something to terminate after a set amount of time.
So here it is! Use whatever you want from it…
* You can download the code here
* Here’s a small demo
The javascript:
–
//from eventinfo .php
var eventExpiration;
var serverDate;
var int_timer;

var url_to_phpFile = "countdown.php";

function calculateTimeLeft(boolShouldRefresh){

	//for the interval, refresh serverDate from php
	//set to false if called outside of the interval
	if(boolShouldRefresh){
		//get time from server again (update time)
		loadServerTimePHP(false);
	}

	//
	var num_currentTime = new Date(Date.parse(serverDate));
	//will expire at midnight that day
	var num_targetDate = new Date(eventExpiration);

	//parse it for calculating
	var distance = num_targetDate - num_currentTime;
	//Time calculations for days, hours, minutes and seconds
	//values calculated for the timer
	//math...
	var seconds=Math.floor(distance/1000);
	var minutes=Math.floor(seconds/60);
	var hours=Math.floor(minutes/60);
	var days=Math.floor(hours/24);
	//
	//math...
	seconds%=60;
	minutes%=60;
	hours%=24;
	//
	//numbers to strings
	sec = String(seconds);
	min = String(minutes);
	hrs = String(hours);
	//
	d = String(days);
	//if single digit "0" infront
	if (sec.length<2) {
		sec="0"+sec;
	}
	if (min.length<2) {
		min="0"+min;
	}
	if (hrs.length<2) {
		hrs="0"+hrs;
	}
	//the above formatted
	t = String(hrs) + " hours, " + String(min) + " minutes.";
	//format days to hide, be plural, or singular...
	if(String(days)<1){
		d = "";
	}else if(String(days)<2){
		d = days + " Day, ";
	}else{
		d = days + " Days";
		t = ""; //hide the time because there are too many days
	}
	//atesat set asfasd
	var str_formatted_time = d + t;// + ":" + String(sec);
	//

	document.getElementById("_countdown").innerHTML = "" + "Event time left: " + "" + "" + str_formatted_time + "
";

	//start or stop the app here, hide ALL UI, throw error!

	if (num_currentTime>=num_targetDate) {
		//event is over
		console.log("The event is over");
		return false;
	}else{
		console.log("The event is still ongoing");
		return true;
	}

	console.log(str_formatted_time);
}

function start_timer(){
	//timer fires off every 5 minutes
	//timer is therefore updated every five minutes
	//this keeps the server from getting flooded with requests to check the time every second
	clearInterval(int_timer);
	int_timer = setInterval(calculateTimeLeft, 300000, [true]);
}

//LOAD THE PHP
//load the date information
//date is taken from server to prevent cheating
//server time is permanent
function loadServerTimePHP(){
	//load the event info php and get all values from that array
	//set the download locations too
	//
	var req = new XMLHttpRequest();
	//listeners...
	req.onload = function() {

		//get the array values, set vars...
		var arr = JSON.parse(this.responseText);
		//
		eventExpiration = arr[0];
		serverDate = arr[1];
		//
		console.log("eventExpiration: " + eventExpiration);
		console.log("serverDate: " + serverDate);
		//for debug pruposes show time and expiration...
		document.getElementById("_currTime").innerHTML = "Event expiration: " + eventExpiration + "
Current Server Time: " + serverDate;

		calculateTimeLeft(false);//call on first run to populate text field
		//successfully loaded, start the timer
		start_timer();


	};

	req.loadend = function() {
		console.log("load ended");
	}
	//on errors, call again...
	req.onerror = function(){
		console.log("error loading php");
	}
	req.ontimeout = function(){
		console.log("timeout loading php");
	}

	//start...
	req.open("get", url_to_phpFile, true);
	req.send();

}

//CALL loadServerTimePHP() to start
–
And the PHP file:
–
//set event to your desired timezone
//see: https://www.php.net/manual/en/function.date-default-timezone-set.php
date_default_timezone_set('America/Los_Angeles');

//CHANGE THIS VALUE TO SET TO DESIRED EVENT EXPIRATION
//the format is imporant
//month should be spelled out, day and year must be numbers
//MONTH DAY YEAR
$eventExpiration = "September 20 2030";

//DO NOT change these...
$serverdate = date('D M d Y H:i:s O');
$arr = array($eventExpiration, $serverdate);

//send as array
//echo( json_encode($arr) );
echo json_encode($arr);

?>
–
Note that you need to upload these and access them from your server in order for them to work.
— — — — — — —
Super basic PHP email form (absolutely no frills)
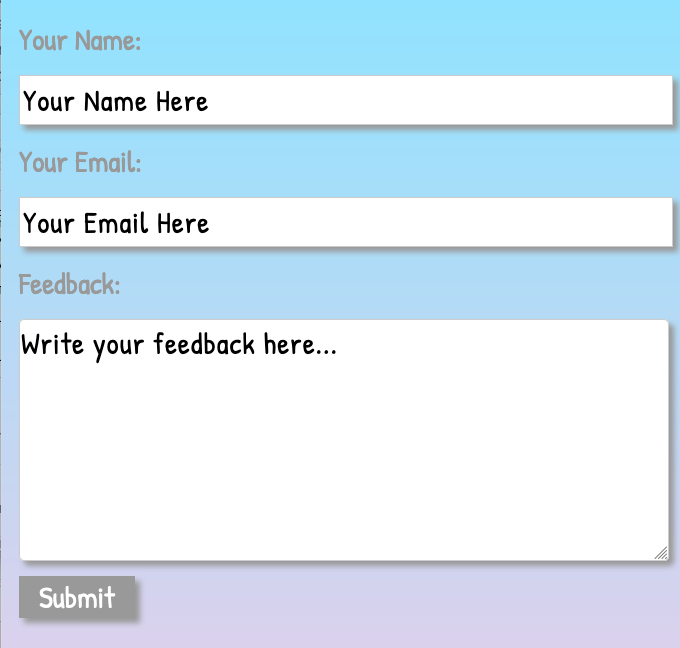
The other thing is a simple PHP email form. There’s a lot out there that do fancy checking, and regex, and Node Mailer is definitely something, then there’s PHPmailer… but in this case I really needed an absolutely basic one that just sends an email (even if it’s from a bogus address).
Note that there is an issue with gmail addresses receiving mail from php’s mail. See this stackoverflow discussion.
You will have to set up an email account on your own server (non-gmail) that catches and forwards these emails to your gmail, if you want to use gmail for this… or use a better solution like NodeMailer or PHPMailer.
Here it is…
The Javascript:
–
<script>

		function init(){

			//ui...
			var inputName = document.getElementById("txt_inputName");
			var inputEmail = document.getElementById("txt_inputEmail");
			var inputMessage = document.getElementById("_feedbackForm");
			var btn_send = document.getElementById("_submitBtn");

			var urlPhp = "mailer.php";
			var _feedbackFor = "YOUR NAME HERE";
			//
			var _subject = "subject";
			var _name = "name";
			var _from = "email";
			var _message = "message";
			//

			//get values when ready
			function getInput(){
				_name = inputName.value;
				_from = inputEmail.value;
				_message = inputMessage.value;
				//make subject
				_subject = "Feedback for: " + _feedbackFor + " from " + _name;
				//
				console.log(_name, _from, _subject, _message)
			}

			function submitInput(){
				getInput();

				var xmlhttp=new XMLHttpRequest();
				xmlhttp.onreadystatechange=function() {
					if (this.readyState==4 && this.status==200) {
						//get a reply (this shows it works...)
						console.log(this.responseText);
						//
						inputMessage.value = "Your feedback has been sent!";
						//close the form!!
						//window.close();
					}
				}

				xmlhttp.open("GET",urlPhp+"?subject="+_subject+"&name="+_name+"&message="+_message+"&frommail="+_from,true);
				xmlhttp.send();

				//close this when done (incase window.close doesn't work)...
				btn_send.style.visibility = "hidden";
				inputName.style.visibility = "hidden";
				inputEmail.style.visibility = "hidden";
				//
				btn_send.removeEventListener("click", submitInput);
			}

			//UI
			function clearOnFocus(event){
				var field = event.currentTarget;
				field.value = '';
				//only do this once...
				field.removeEventListener("focus", clearOnFocus);
				console.log(field.name);
			}


			inputName.addEventListener("focus", clearOnFocus);
			inputEmail.addEventListener("focus", clearOnFocus);
			inputMessage.addEventListener("focus", clearOnFocus);
			//
			btn_send.addEventListener("click", submitInput);

		}

	</script>
–
And the PHP file:
–
//in the future use PHPMailer https://github.com/PHPMailer/PHPMailer
//var $name;
$name=$_GET["name"];
$message=$_GET["message"];
$subject=$_GET["subject"];
$frommail=$_GET["frommail"];
//CHANGE THIS TO YOUR EMAIL
$to = '' ;
$headers = 'From: ' . $frommail . "\r\n" .
'Reply-To: ' . $frommail . "\r\n" .
'X-Mailer: PHP/' . phpversion();
mail($to, $subject, $message, $headers);
//echo reply to see if it worked...
echo "Message success: " . " " . $name . " " . $message . " " . $subject . " " . $frommail;
?>
–
Again, you’ll have to upload this to your server and access it there… in order for this to work.
Also, be sure to update the .php file with your desired email address.
— — — — — — —
Ok, that’s all!
I hope someone coming in from google finds some of this useful. :)